

Invite someone
There is no way to create a login for someone else or add an existing user directly. Everyone joins by accepting an emailed invitation, so the person who joins owns their own password.1
Open Team Members
Go to Workspace Settings → Team Members and select Invite member.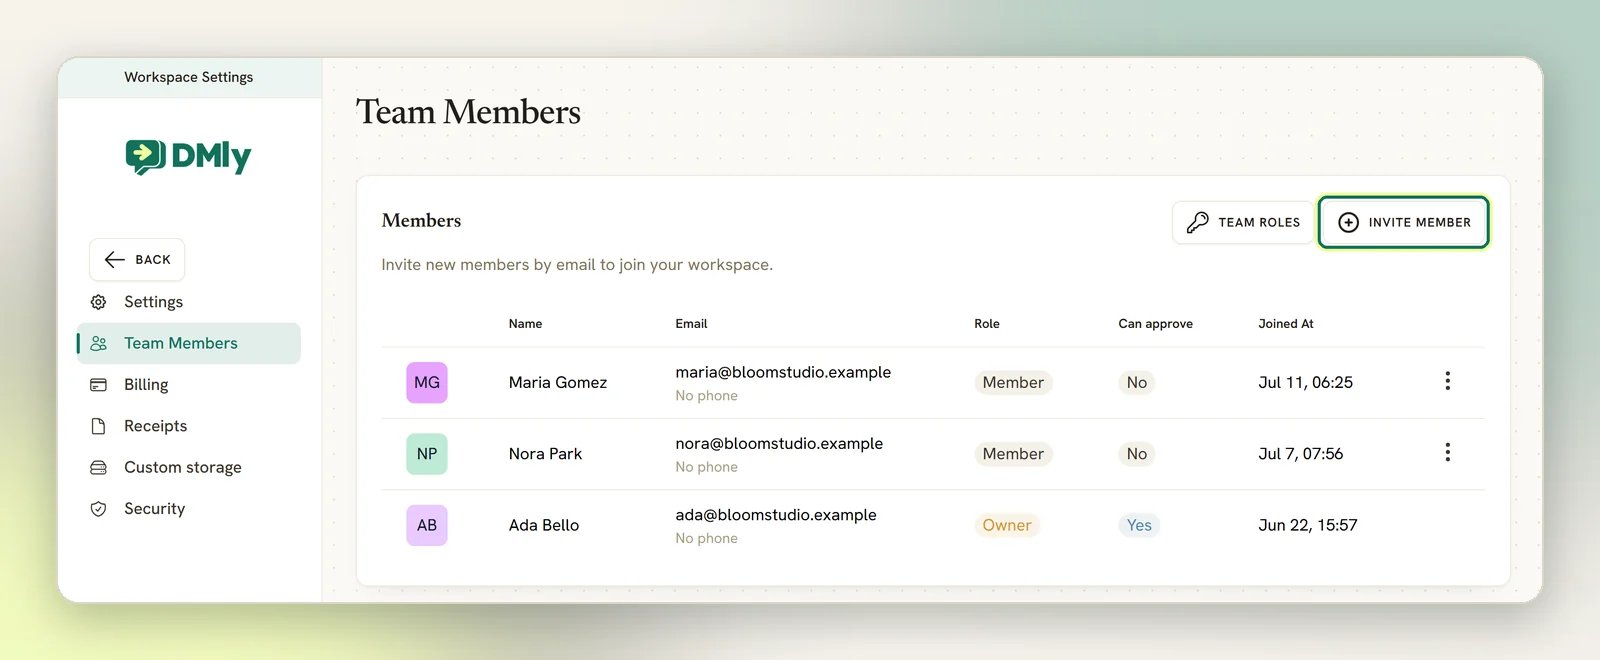
2
Enter their email address
Use the address they’ll sign in with. The invitation goes to that address.
3
Pick a role
Choose Admin, Member or Viewer (see below). If you’ve built a custom role,
you can pick it under Custom role instead; leave it on None — use the base role above
to stick with the base role.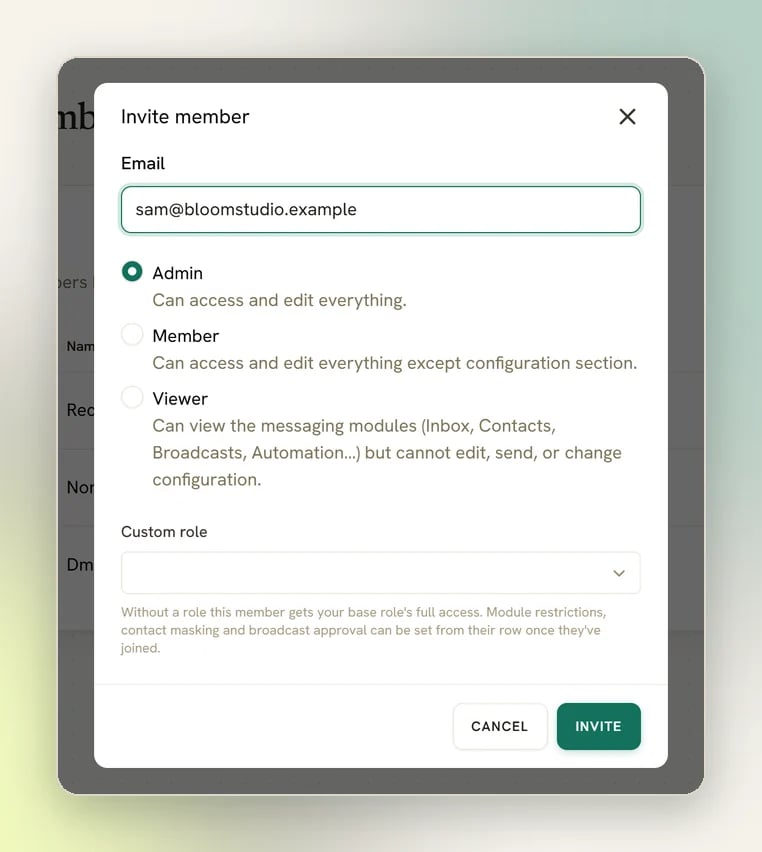
4
Send it
Select Invite. The invitation appears at the top of the members list with a Pending
badge until they accept.
Fine-tune a member’s access
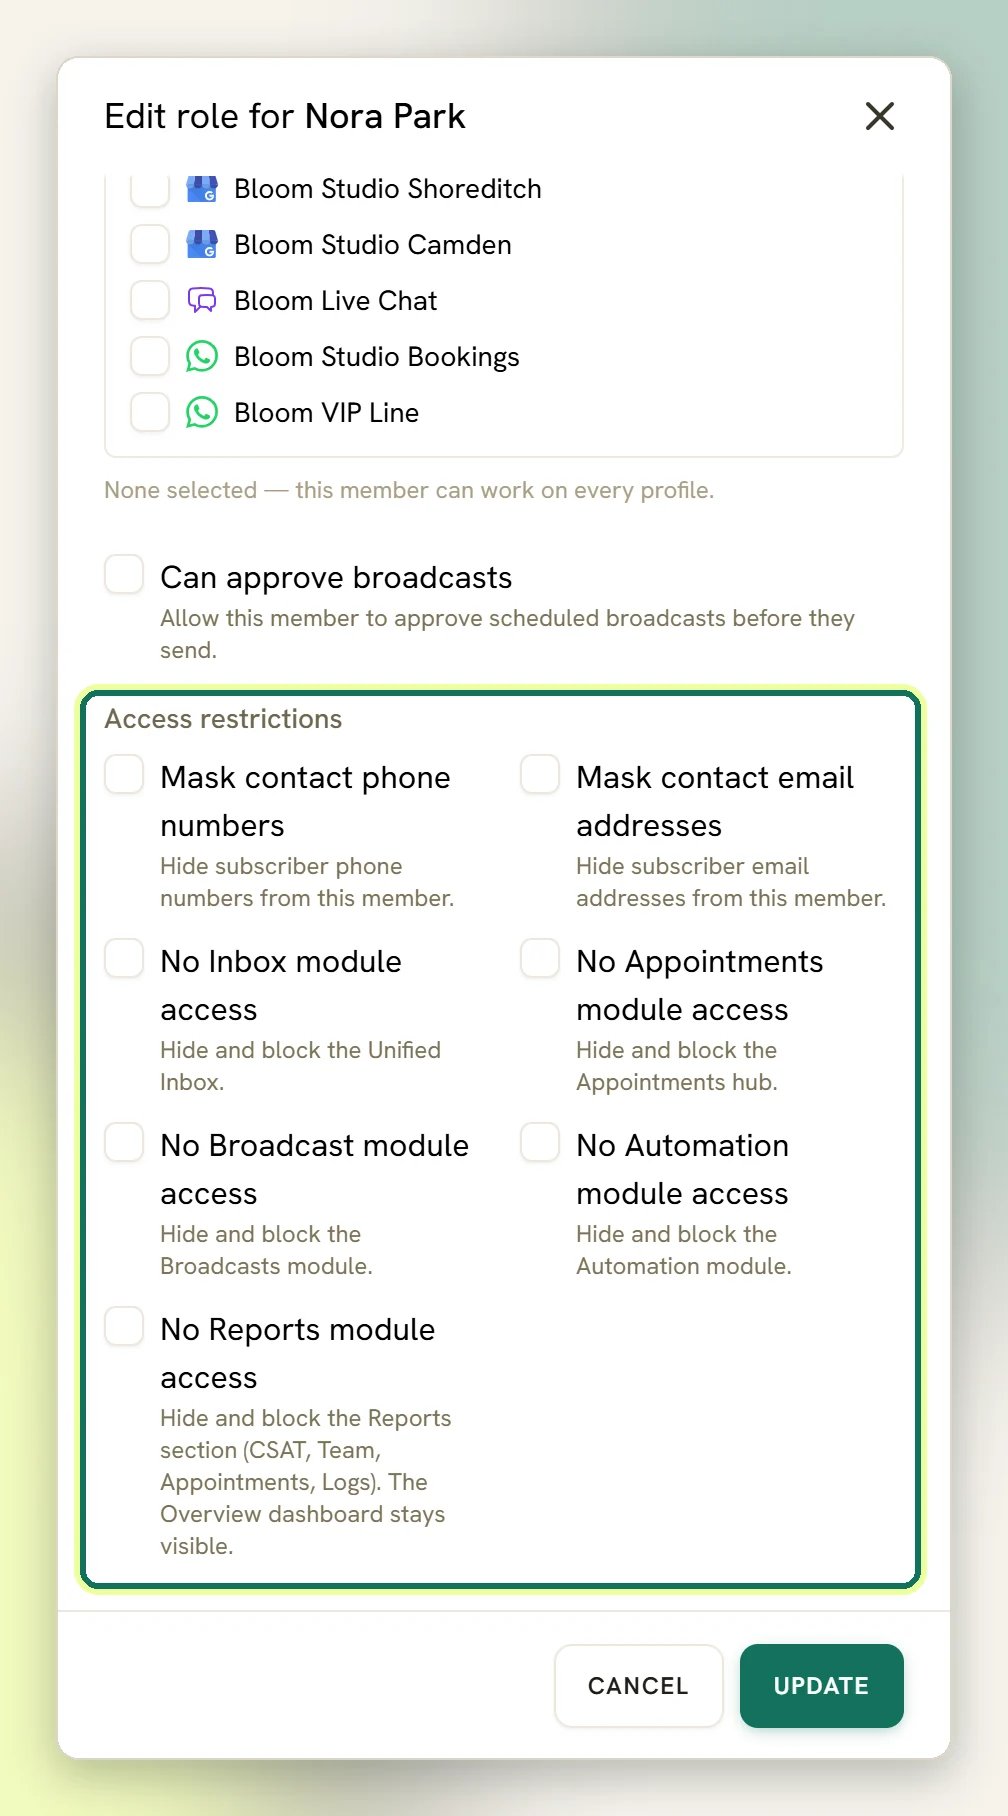
Once they’ve joined, open the menu on their row and choose Edit role. There you can:- Tick the Profiles they can work with.
- Tick Can approve broadcasts to let them approve scheduled broadcasts before they send. The members list shows this in its Can approve column.
- Under Access restrictions, tick Mask contact phone numbers, Mask contact email addresses, No Inbox module access, No Appointments module access, No Broadcast module access, No Automation module access or No Report module access.
The three roles
Every team member has one of three base roles.Admin
Can access and edit everything, including settings, billing and the team itself.
Member
The everyday operator role: they work the inbox, contacts, their own appointments and
campaigns. They can’t change how the workspace is set up, and some actions stay with
admins: deleting, importing or exporting contacts, contact documents, approving or deleting
broadcasts, deleting automations or templates, seeing or editing other staff’s appointments,
working hours and appointment settings, refunds and finance settings, report export, channels
and API keys, the team and the audit log.
Viewer
Read-only: they can view Offerings, Finance, Reputation, reports and logs, and they see full
contact phone numbers and email addresses. In Appointments they see only bookings on their
own staff row, and they can’t open the audit log. They cannot edit, send, or change
configuration.
What uses up a seat
Your plan sets how many people can be in the workspace, and three things count against it:- People who have joined, the obvious one.
- Invitations that have not been accepted yet. If you invite someone and they never accept, that seat stays used until you cancel the invitation.
- Active appointment staff who have no login of their own. This is the one that catches people out. A stylist or practitioner you added purely so bookings can be assigned to them takes a seat exactly as a teammate does, even though they never sign in. Three unlinked staff on a five-seat plan leave you two seats for actual logins. Deactivating a staff member releases their seat.
Members limit reached. Max limit: N (N is your seat cap, add-ons included) and won’t send. Two ways out:
Cancel stale invitations
Free up seats people never claimed. See below.
Add capacity
Move to a plan with a higher limit, or buy an additional teammate add-on.
Cancel a pending invitation
Open the menu on the invitation’s row and select Cancel, then confirm. The link stops working and the seat is freed immediately.You can’t change the role on an invitation that’s still pending. Cancel it and send a new one
with the right role.
Remove someone
Open the menu on their row and select the remove option, then confirm. They lose access to the workspace straight away, and the seat is freed. Two rows never show an actions menu:- Yourself. You can’t remove your own access or change your own role.
- The workspace owner, who carries an Owner badge instead of a role badge.
Next steps
Roles and permissions
Build a custom role with exactly the permissions you want.
Notifications
Choose which events alert your staff.
Plans
See what your plan includes.
Add-ons
Buy extra teammate seats on top of your plan.