

What every contact profile shows
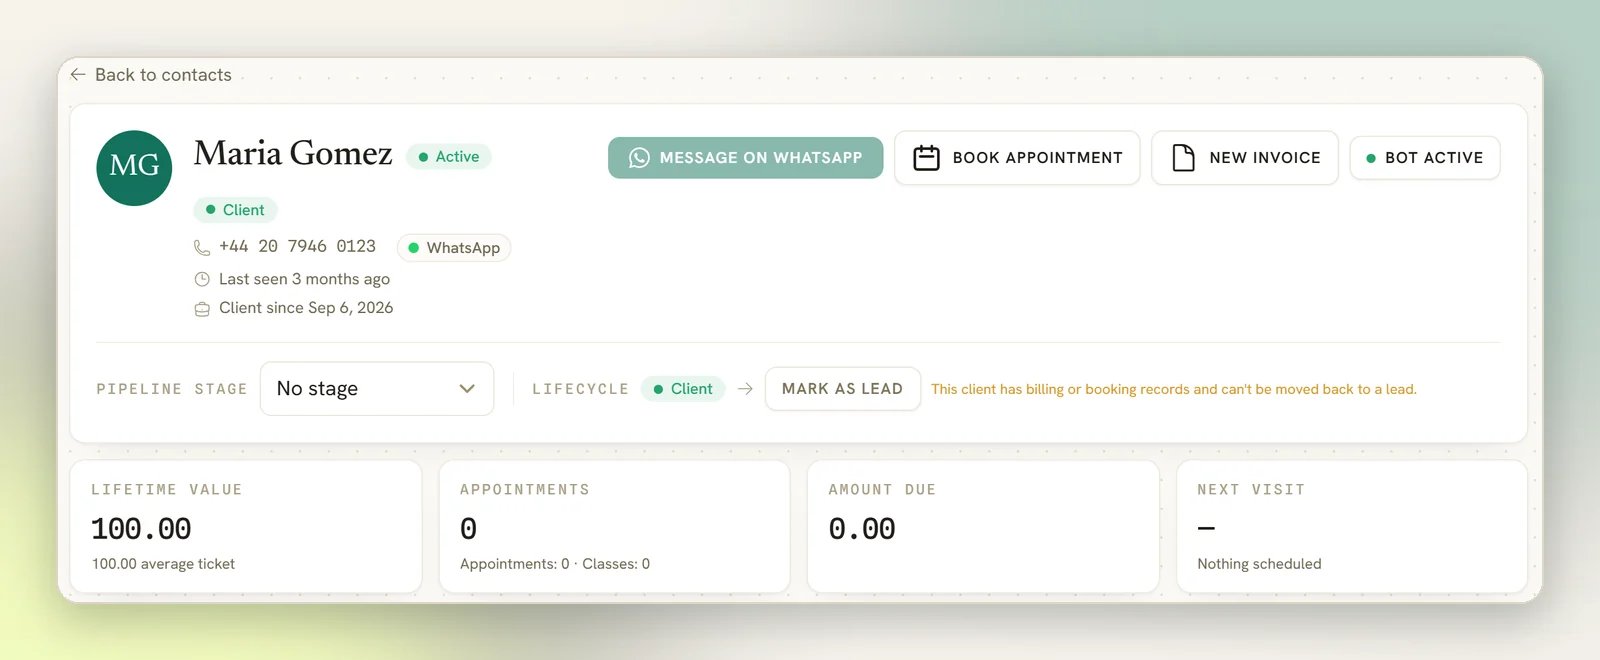
The header carries the name, the handle, the platform badge and the lifecycle badge, with four metrics underneath. A client, or any contact with a booking, gets Lifetime value, Appointments, Amount due and Next visit. Everyone else gets these four:Messages exchanged
The total message count across every channel this person uses.
Tags applied
How many tags are currently on the contact.
Last interaction
When they last did something, the same timestamp the contacts list sorts on.
Source
Where this contact came from, the same Source value listed in the profile rows
below. It is set when the contact is created.
- Conversation summary (Overview): the Last inbound message they sent, or No messages from this contact yet.
- Profile card (Overview): Contact ID, Email, Phone, Gender, Language, Timezone, Birthday, Opt-in through, Source, Subscribed. Empty rows are hidden, so a sparse contact shows a short list.
- Flow answers (Profile tab, when there are any): the question, the answer and the date, for each answer captured by your flows.
- Activity timeline (Activity tab): what has happened to this contact over time.
- Channels: every identity this person has, with the Primary one marked. One profile, many channels — replies, history and CRM data are shared.
- Internal notes (Notes tab): private to your team; the contact never sees them.
Message the contact
The message button is channel-aware and never lies to you. If you have WhatsApp connected and this person has a phone number (or reached you on WhatsApp in the first place), you get Message on WhatsApp. Otherwise it offers their own platform: Telegram, Instagram and so on. If neither works, the button is disabled and tells you why: Connect a WhatsApp number to message this contact on WhatsApp, or Add a phone number to message this contact on WhatsApp.The button opens the conversation in your Inbox. It is not an external
wa.me link, so the reply is logged against the contact like any other message.
Pause the bot for one person
Select the Bot active button in the header to hand this conversation to a human. It then reads Bot paused, and quick automations, sequences and booking reminders all skip this contact; your team’s manual replies still go out normally. Select it again to resume. This is a per-contact switch and is separate from blocking or unsubscribing, which are set elsewhere. See Data and privacy.Tags, stage and custom fields
- Add tag edits tags inline. Type a new name and press enter to create it. See Tags and segments.
- Pipeline stage moves the contact along your CRM pipeline, the same axis you drag on the Pipeline view.
- Custom fields, on the Profile tab, is a Field name / Value list with an Add field button. Values you store here are targetable: a segment’s Conditions builder has a Custom field rule, and a segment is what a broadcast points at. See Custom fields.
Merge duplicates
If another contact in the workspace shares this person’s phone number or email address, a three-dot (⋮) button appears in the profile header, to the right of Book appointment and the bot-status button; hovering it shows Possible duplicates. Open it and you get the line These contacts share a phone or email with<contact name>. Merge to combine their channels, history
and tags into one profile., then a row per candidate. Select the duplicate’s name to start the
merge.
If they share neither, which is normal for a Facebook or Instagram contact, the button doesn’t
appear at all and you merge the pair from the Contacts list instead: tick exactly two rows and
select Merge on the bulk bar. See When one person becomes two
contacts.
A merge never drops a protection. If either side had opted out, the surviving contact stays
opted out; if either side was blocked, the survivor stays blocked; if either side had declined
WhatsApp calls on a number, the survivor stays declined on it; and if either side was a Client,
the survivor stays a Client. See When one person becomes two
contacts for the full list.
Convert a lead to a client
Select Convert to client. DMLY asks you to confirm, creates the client’s finance record, writes a line to the timeline and can trigger an automation.A client needs at least a phone number or email so you can reach and invoice them. If the
contact has neither, DMLY asks you to add one before it will convert them.
The client half
The current stage is a Lifecycle badge in the profile header, next to Convert to client or Mark as lead. The conversion date shows in the header as Client since and a date, and as a Client since row on the Overview’s Profile card. Nothing names who did it. For that, open the Activity tab: converting a lead adds an Internal note added entry reading Converted to client, timed like every other line on the timeline. Once the contact is a Client, four money tiles appear above the records tabs, and a fifth joins them once this client has tipped:
Tips collected is hidden until that figure is above zero, so most clients show four tiles
and not five. See Collect a tip at checkout.
The records tabs
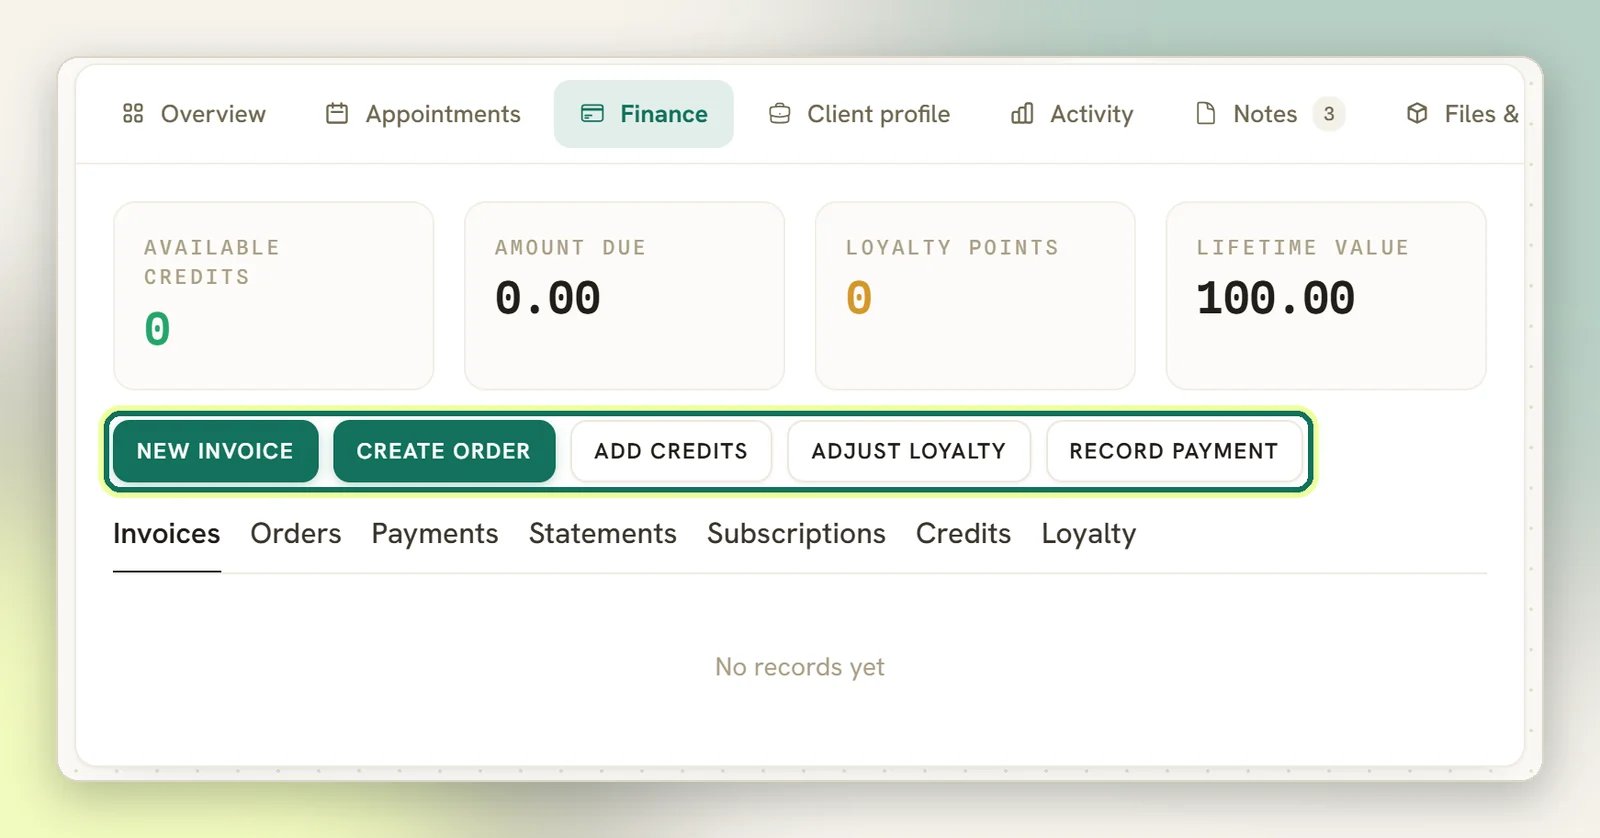
Seven tabs sit below, opening on Invoices: Invoices · Orders · Payments · Statements · Subscriptions · Credits · Loyalty Bookings and classes are not here. They are on the separate Appointments tab, which filters by All, Upcoming, Past and Classes. An empty tab reads No records yet.Each tab shows at most the 50 most recent rows. For a long-standing client this page is a
summary, not the full ledger; go to Finance or
Appointments for everything.
Client actions
Five actions sit above the records tabs. Two jump you into the right screen with this client already selected:New invoice
Opens Finance on a new invoice for this client.
Create order
Opens Finance on a new order for this client.
Book appointment is not one of them. It sits in the profile header next to the message
button, and it works on any contact rather than only a client: selecting it opens the
Appointments calendar with this person already chosen.
1
Add credits
Enter a whole number of Credits and, if you want, an Expiry date (optional) and
a note. Use this for a package the client paid for offline, or a goodwill top-up.
2
Adjust loyalty
Enter points to grant, or a negative number to take points away: Use a positive number
to add points or a negative number to deduct them. A Reason is required, so the
ledger always says why.
3
Record payment
Log money you took outside DMLY: cash in the salon, a bank transfer. Enter the
Amount, Payment method and Payment date. Against invoice lets you settle
one of this client’s own unpaid invoices; leave it on No invoice for a payment that
isn’t tied to one.
You cannot spend credits from this page; Add credits only ever adds. Credits are
consumed when the client books an appointment against a package, or by the credits step in
an automation. The ledger is append-only: nothing on it is
edited or deleted, so a mistake is corrected by posting the opposite entry, not by undoing
the old one.
Billing details
Open the Client profile tab to set what invoices and statements need: Company name, Billing name, Billing email, Billing phone, Tax ID, Default currency and Payment terms. Below them are the client’s details (preferred name, ID number, marital status, referral source, primary staff member), an emergency contact, addresses and notes, followed by custom fields and flow answers.Delete a contact
Deleting a contact is done from the contacts list, not this page: open the ⋯ menu on the contact’s row and choose Delete (it needs the contact-delete permission). It removes the person and everything hanging off them: their channels, their entire message history, their notes and their client record, and the commercial history on this page as well, the invoices, payments, orders, subscriptions and appointments. The contact isn’t gone at once. It moves to Contacts → Recently deleted for 30 days, where Restore brings back the person and their records. Attachments and documents are removed at the time and cannot be restored. Delete permanently there destroys the last copy.Contacts overview
How contacts, leads and clients fit together.
Finance
Invoices, payments, orders and subscriptions in full.