

The Reseller Dashboard link only appears in your user menu once your workspace is on a
reseller plan. If you don’t see it, see Agency overview.
How client workspaces are created
There is no button to create a client workspace in the reseller dashboard, by design. Workspaces arrive one of four ways:A customer signs up on your domain
Your branded sign-up page creates the customer’s account and their first workspace under
your agency, on your first enabled plan. See Custom domain.
You provision one over the API
POST /workspaces on the Agency API creates the owner’s user account and their workspace
under your agency in one call, on a plan you name or your first enabled plan. The response
includes the owner’s name and email. See
Agency API.An existing customer adds a workspace
A workspace created by someone who already belongs to your agency stays under your
agency automatically.
Your own workspace
The workspace you were in when you took a reseller plan is moved under your agency
automatically, which is why it shows in this list.
Whether customers can create a second workspace is your call, not the platform’s. It’s
controlled by Customer signup & workspaces in Settings, where Off closes your
public sign-up page turns sign-ups off entirely. Most agencies sell one workspace per
customer and leave the extra-workspace setting off.
What your sign-up page says
The same Settings → Customer signup & workspaces panel controls the wording on your branded sign-up page. Alongside the two Yes/No dropdowns it carries three copy fields, all saved with Save signup settings:- Sign-up form title is the heading. It starts out as Create your account, and clearing it falls back to that same wording. Up to 255 characters.
- Sign-up form description is the line under the heading. It starts out as Start your free trial. Clear it and no description line shows at all. It is plain text: line breaks are kept, HTML tags are not interpreted. Up to 500 characters.
- Terms text (shown by the accept checkbox) changes behaviour, not just wording. Write anything here and your sign-up page gains a tick-box carrying that text, which the customer must tick before the account is created. Leave it empty and there is no checkbox and no consent step. Up to 2,000 characters.
https:// becomes a link that opens in a new tab.
https:// addresses become links; an http:// address stays plain text. A full stop or
closing bracket straight after the address is left out of the link, so the address can end a
sentence.
Terms text used to accept HTML. If you had saved a link such as
<a href="https://acme.com/terms">Terms</a>, it was converted for you to
Terms (https://acme.com/terms), which still shows as a link. Where a link was followed
straight away by more text, a space was added after the address so each link still opens the
right page. Other tags were removed and their text kept. Read your terms once in the panel to check they still say what you want.The sub-account limit
The number of client workspaces you can carry depends on your reseller plan. When you hit it, the Sub-accounts page shows You’ve reached your sub-account limit. Contact support to raise it., and your branded sign-up page stops accepting new customers. See Plans.Assign a plan
A new sub-account lands on the first enabled plan in your plan list; there is no separate “default plan” setting. If you have no enabled plans yet, it lands with no plan at all. To move a sub-account to a different plan:1
Build the plan first
Plans live under Configuration → Plans in the reseller dashboard. Each plan sets the
limits the workspace gets. See Plans and billing.
2
Pick the plan on the sub-account
On Sub-accounts, use the — assign plan — dropdown on the workspace’s row and
choose the plan. You’ll see Plan assigned to the workspace name.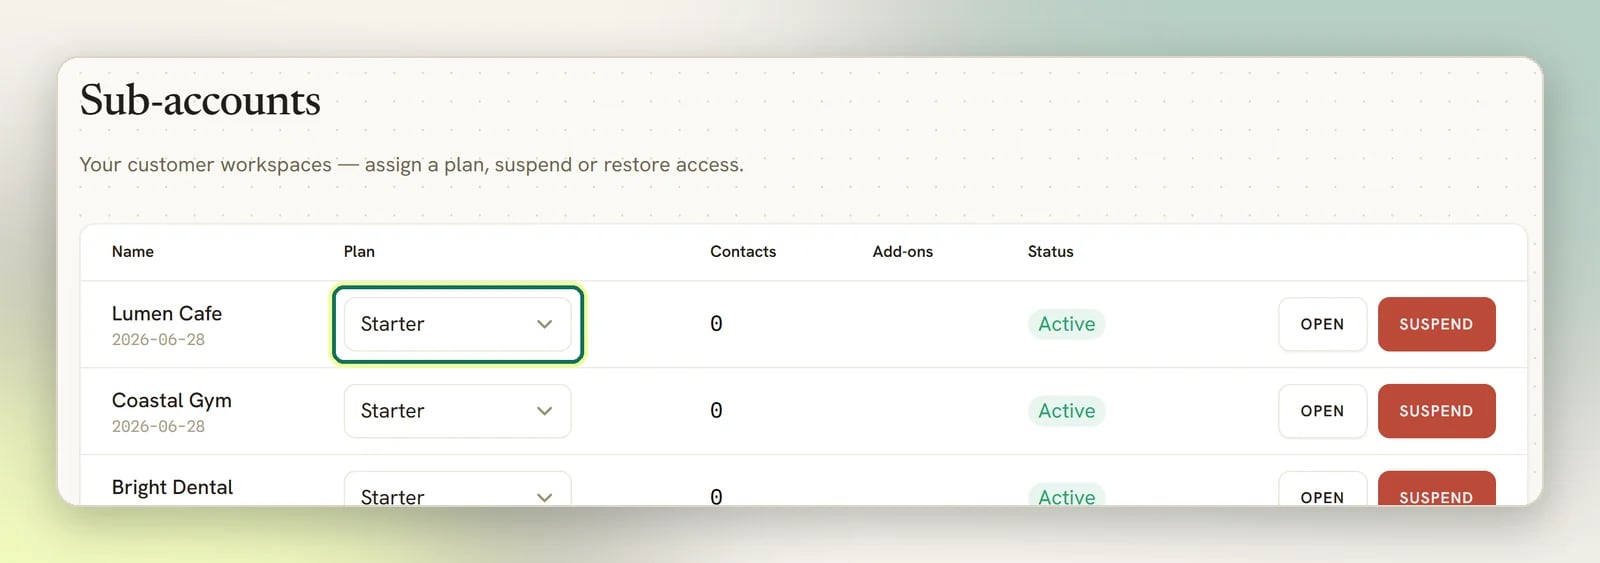
A plan that’s assigned to a sub-account can’t be deleted; you’ll get This plan is
assigned to sub-accounts. Reassign them before deleting it. Move those workspaces to
another plan first.
Grant an add-on
When a client needs more than their plan allows, grant an add-on instead of moving them up a plan.1
Build an add-on plan first
Under Configuration → Plans, switch on Add-on plan, pick an Add-on type:
Extra contacts, Extra profile per channel or Additional teammate. Then
set Quantity granted (per unit).
2
Grant it on the sub-account
Your add-on plan then appears in the + grant add-on dropdown on each sub-account’s
row, listed by the name you gave it. Until you create one, the dropdown doesn’t appear
at all. Granting adds that capacity to the workspace’s limits straight away; grant again
to add another unit.
+500 contacts. Select the
× on it to take it back.
Add-ons you grant are billed by you, to you; there is no checkout for the customer, and
your clients never see DMLY’s own add-on catalogue or prices.
Open a client workspace
Open signs you in to the workspace as its owner. You get exactly what the owner gets: the full inbox, contacts, automations, appointments, finance. Nothing is hidden from you.Opening a workspace is recorded in the client’s own log
Before you are signed in, DMLY writes an entry into that workspace’s Audit log: the actionagency.impersonate, the summary Agency opened this workspace as its owner, your
name in the Who column, the IP address you opened it from, and the time. The entry
belongs to the client’s workspace, not to your agency, so your client can read it: the
workspace owner, their Admins, and anyone whose role grants View the audit log see it
under Settings → Audit log. See
Read the workspace audit log, which also covers how long entries are
kept.
What the entry does not do is label the work you then do. From the moment you are signed in,
DMLY treats you as the owner, so anything you do inside the workspace that writes its own
audit entry is attributed to the owner’s account rather than to you. The log shows that you
opened the workspace and when; it does not separate your actions inside it from the
customer’s own.
While you’re inside the workspace, your user menu shows an Impersonating badge. Select
Sign Out in that menu; while impersonating it ends the session-as-owner and drops you
back into your own account rather than logging you out.
Because Open gives you the owner’s full view, it includes your client’s customer
conversations and contact data. Treat it as access to their business, and tell your clients
you have it before they find the entry themselves: every time you use Open leaves your
name in their audit log. See Contacts data and privacy.
This sub-account has no owner to open
This sub-account has no owner to open
Nobody owns the workspace, so there’s no account to sign in as. This is rare; it usually
means the owner’s user account is gone.
You own this sub-account directly
You own this sub-account directly
The workspace is one of your own, not a client’s. Switch to it from your workspace
switcher instead.
Suspend and restore
Suspend locks a client out of their workspace. Use it when they stop paying you. Their data stays exactly where it is; only access stops. Restore puts it back. The Status column shows Active or Suspended.What clients see
A client in one of your workspaces sees your brand, not DMLY’s, and their Billing menu goes to your plans, charged through your Stripe account. They never see DMLY pricing. Set that up in Plans and billing and Branding.Plans and billing
Build the plans you sell and connect your own Stripe account.
Custom domain
Serve your agency (and your sign-up page) on your own domain.
Branding
Set the app name, logo and colour your clients see.
Agency overview
How the agency layer fits together.